A Comprehensive Guide to Bulk Testing Multiple URLs with Google PageSpeed Insights API
Manually testing the performance of each page individually can be time-consuming and inaccurate. With this step-by-step tutorial, you'll learn how to test multiple URLs at once using Google's PageSpeed Insights API and a NodeJS script. By following this tutorial, you'll be able to customize the number of iterations, select the device mode (mobile or desktop), and obtain the test results in CSV and JSON formats. No prior development experience is required; let's start.
You know how sometimes you need to test a bunch of URLs for Speed, Performance, Core Web Vitals… of course you do. Instead of performing the tests manually one by one, page by page, you can follow this little tutorial here 👇 and bulk test multiple pages at once.
Of course you could use one of the numerous SEO tools out there, but let's imagine for a minute that you don't want to do that, for any given reason.
With this tutorial, you will use Google's PageSpeed Insights API through a NodeJS script on your computer, to test multiple URLs, set the number of itirations (say let's test each URL 3 times), set the device mode (mobile or desktop), and get the results back with minutes in both CSV / JSON formats. If you're good with that, read on. No dev experience required, this tutorial will guide you step by step.
I have to say I love the Bulk PageSpeed Test site experte.com - it does what we're about to do and much more for free (at the time of writing - I am not affiliated to them in any way). Our tutorial has one added value though, we can test each page up to 5 times and receive the median results for a slighly better accuracy (but yes, we are still in lab data mode although you could get the CrUX as well… enough of that for now).

Table of Contents
- PageSpeed Insights API from Google Cloud Console
- Get the code from GitHub and get NodeJS
- Get the URLs of your pages
- Launch the test
- The test results
The process:
Get the API key from Google Cloud Console
Download ready-made code from GitHub
Install dependencies
Obtain the URLs of the pages to be tested
Run the test and get the results in CSV and JSON format
PageSpeed Insights API from Google Cloud Console
First step, get the API key
- Your Google Cloud Console account
We're assuming that you already have Google account, if not you need to get one. Then if you don't have a Google Cloud Console account, sign up for one. You can get it from the Google Cloud Console and you don't need to activate any free credits. My indexing API tutorial might help you get started with Google Cloud Console.
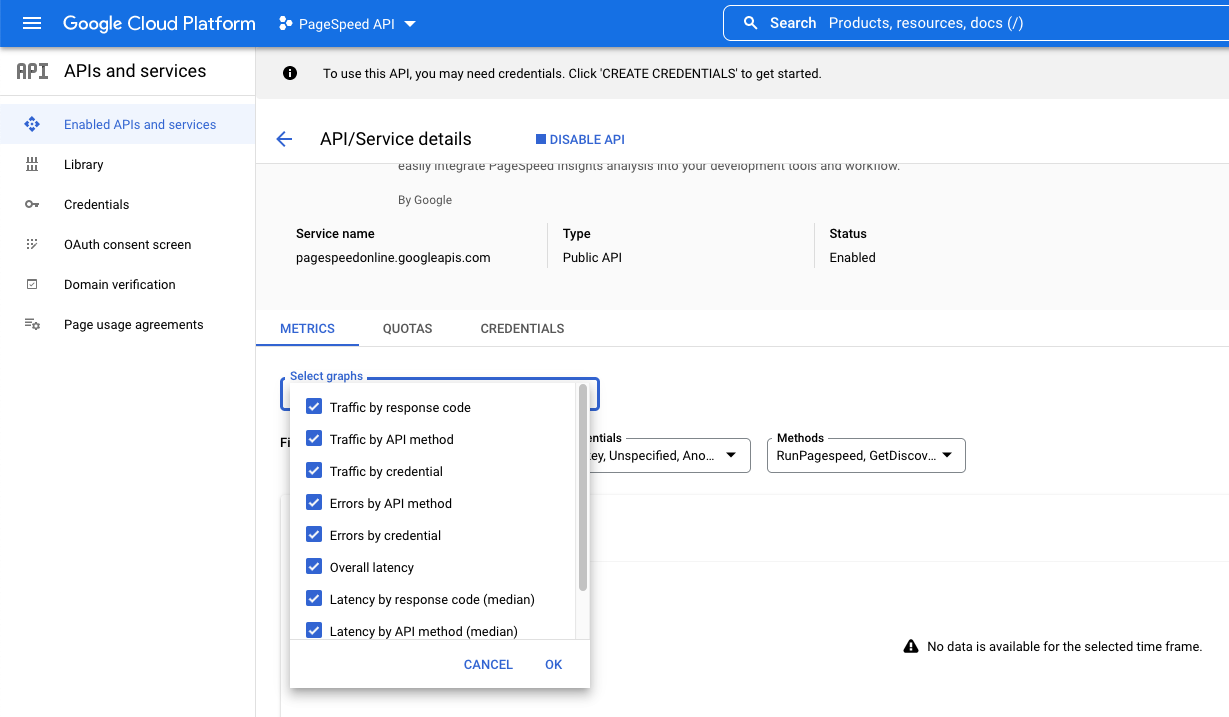
- Get the API key
Visit PageSpeed Insights dev docs for a quick and easy start.
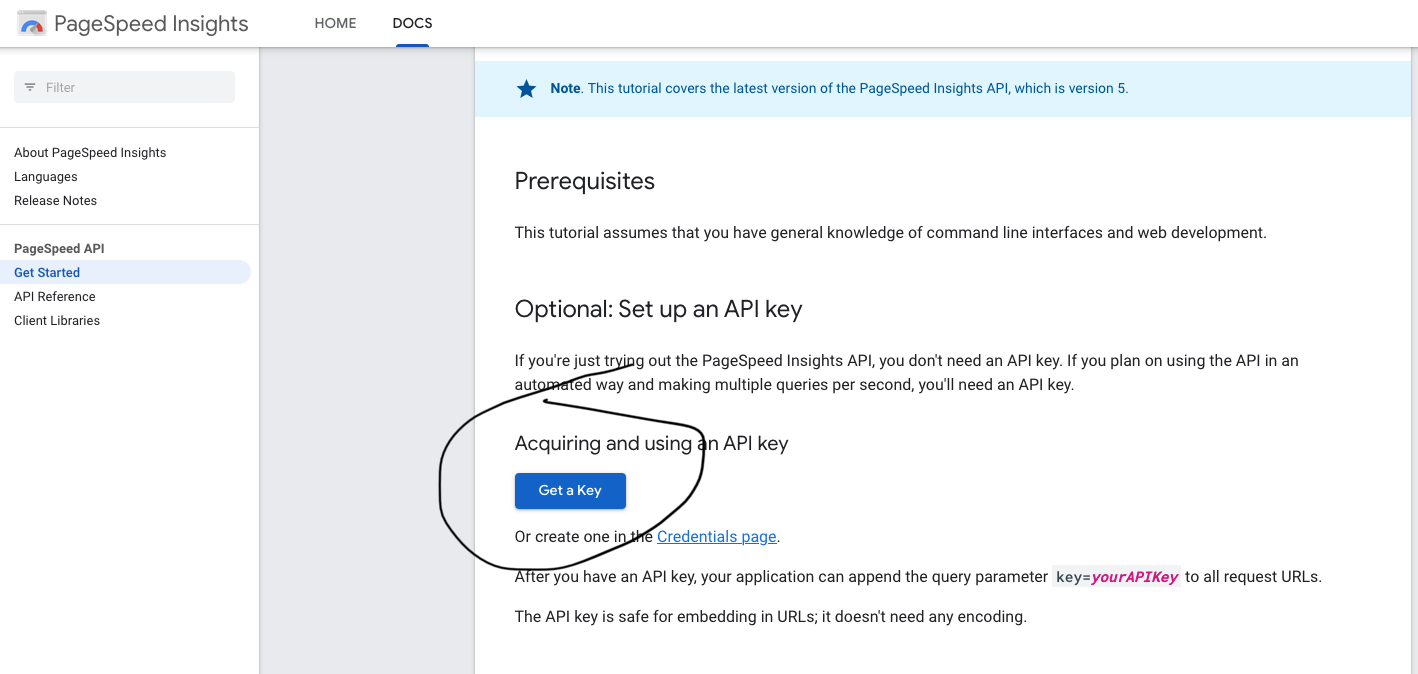
- Click on Get a Key
Create a new projet. Call it what you like, say PageSpeed API Testing for example.
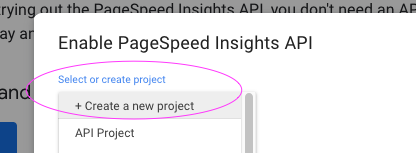
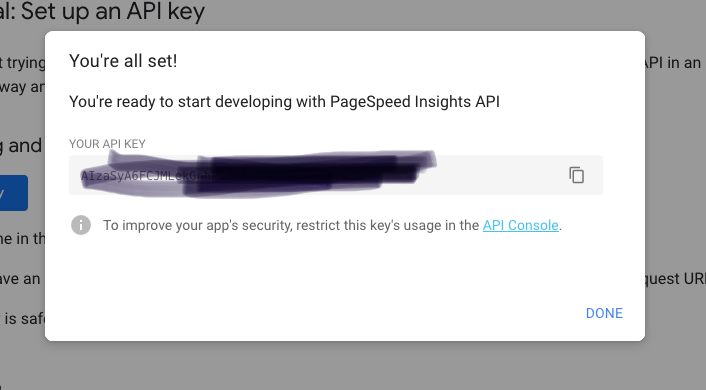
- Click "next" and copy the key (a series of letters and numbers).
This is your API Key, keep it somewhere accessible and safe for the moment, on a notepad for example. We will need it during the course of the setup.
Securing the API
Before closing the modal screen, let's secure the API by restricting its usage. Click on API Console, a new tab will open with the Google Cloud Console account.
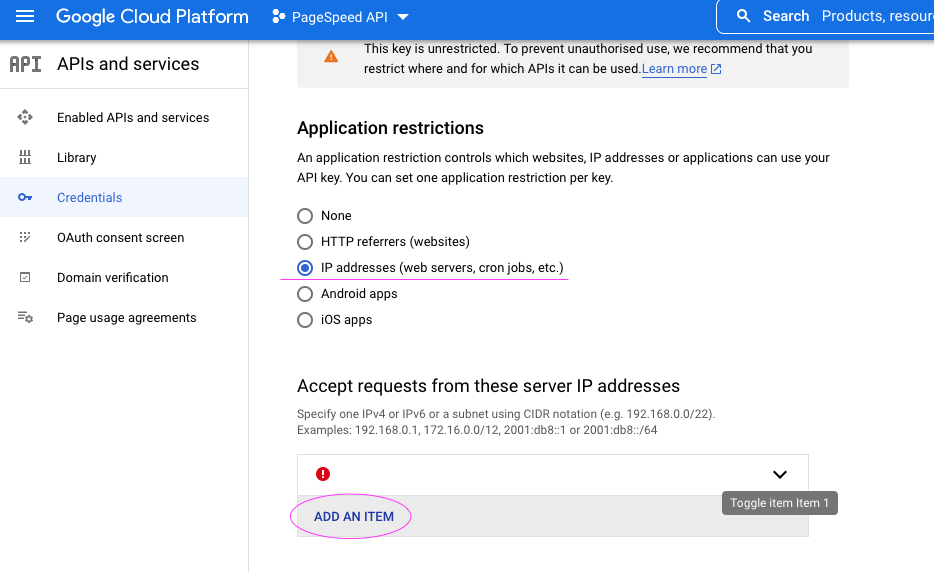
For myself, I chose the IP address security.
I then restricted the key to be used with PageSpeed Insights API only.
Using the IP address restriction works for me, I'm at a particular location for work, and I don't plan to use the API through a web server or another website. I added both my IPv4 and IPv6 addresses.
Regarding the API restrictions, I chose the limit the usage of this key to the PageSpeed Insights API only. It helps not to mix in between projects.
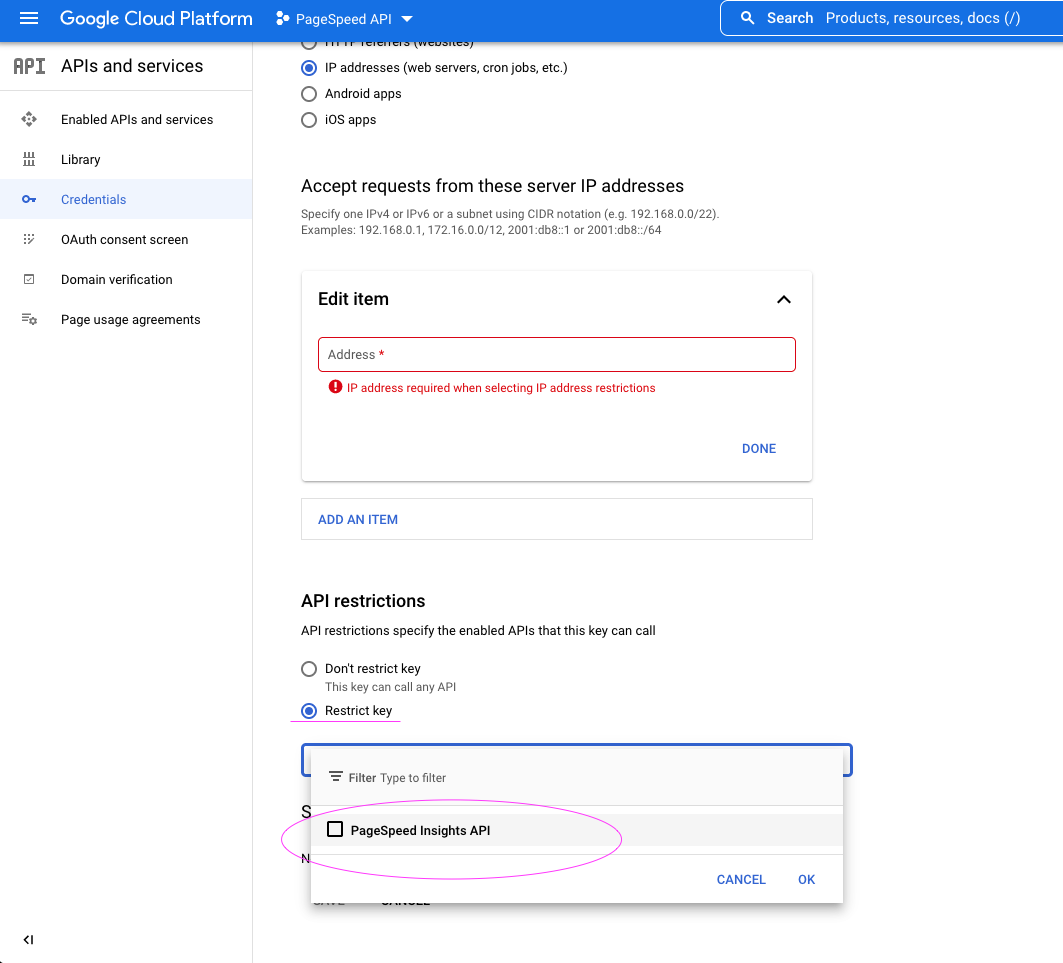
If you need help getting your IP address, just Google it (what is my IP). You could continue and work without securing the API if this is too complicated.
Note : in case you do not see PageSpeed Insights API as an option to select, stay on the Google Cloud Console, go to the Library, search for PageSpeed API, and add it after creating a project. Normally if you have followed the above steps, everything is already setup for you. Contact me for assistance or check this indexing API tutorial that covers the Google Cloud Console part.
Get the code from GitHub and get NodeJS
- Install Node.JS on your computer if you don't have it already. To check, open your terminal window and type
node -vto get the version of node or check if installed. You need version 14 or above.

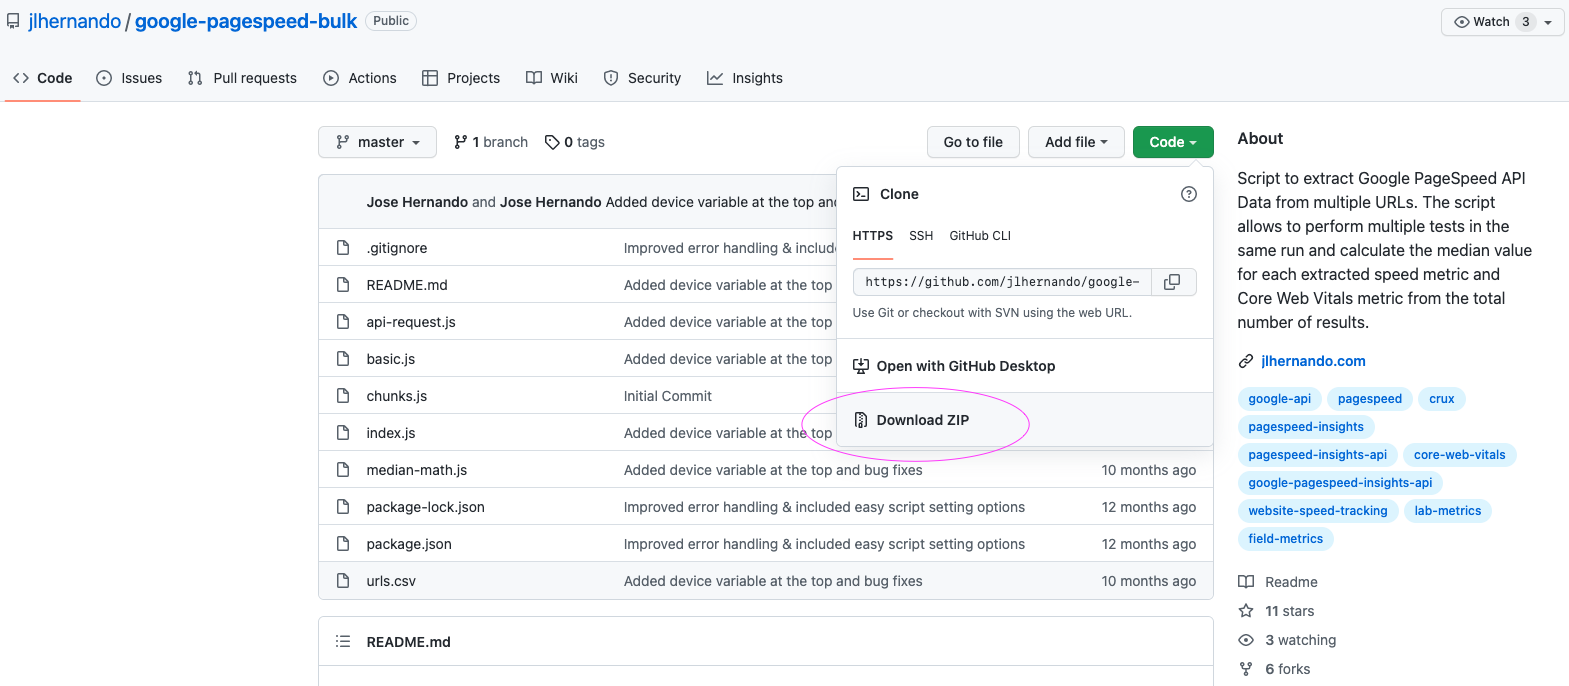
- Download the script:
Dowload the script from GitHub - unzip it to a folder and name that folder to your liking.
Many thanks to Jose Hernando for his script 💯
- Visual Studio :
Open the folder you have just created with Visual Studio. Any other editor will also do. You can install Visual Studio from the official website.
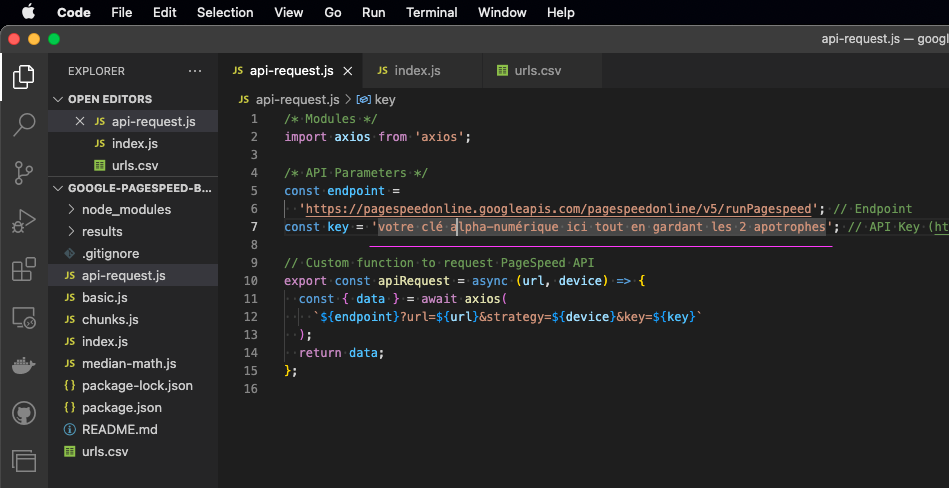
Add your API key to the script
Modify the file “api-request.js” by adding the API Key that you had saved (letters and numbers). Keep the apostrophe around the key. In this example image, on line 7 you can see const key = 'insert your key here'; do not remove punctuation.
Install dependencies:
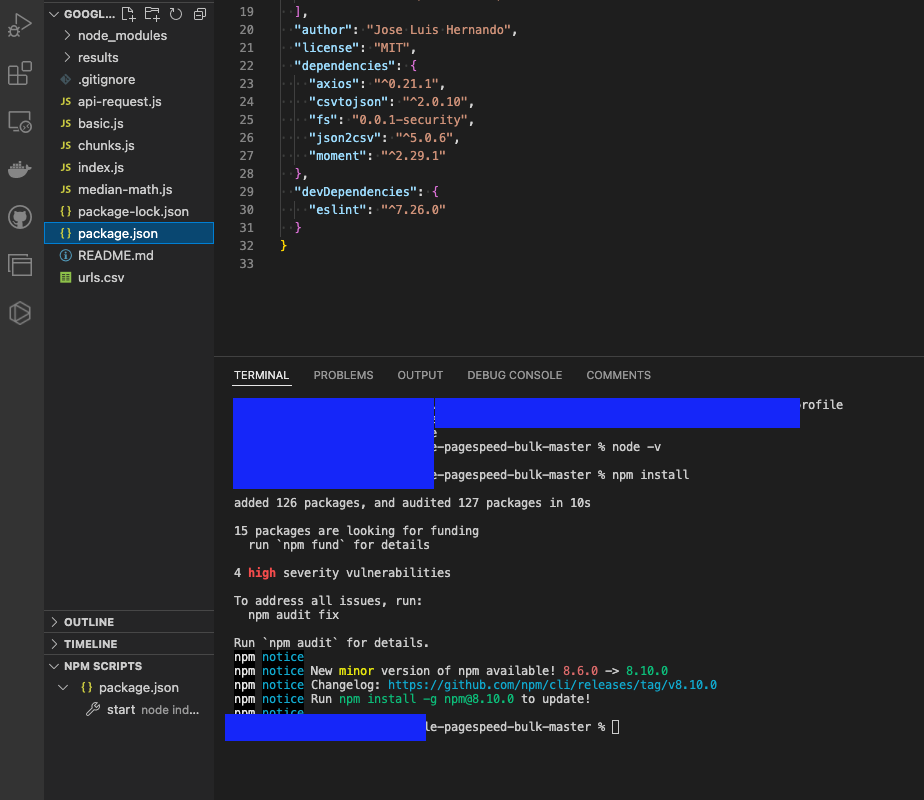
Launch the terminal into your folder, ( Visual Studio has a built in terminal ), and type the command npm install

This should install the dependencies found in package.json. You need this step. Here's what it could look like, of course it will be different on your machine.
We're almost ready to start bulk testing but we are still missing the URLs that we want to test.
Get the URLs of your pages
There are plenty of options to assemble the URLs of the pages that you'd like to test. You could use the sitemap of your website, or grab them from a crawling tool such as Screaming Frog (free to use up until 500 URLs), or even better, just go to your Google Search Console and grab those pages you'd like to test by downloading them in CSV.
Here's an example from the GSC (Google Search Console):

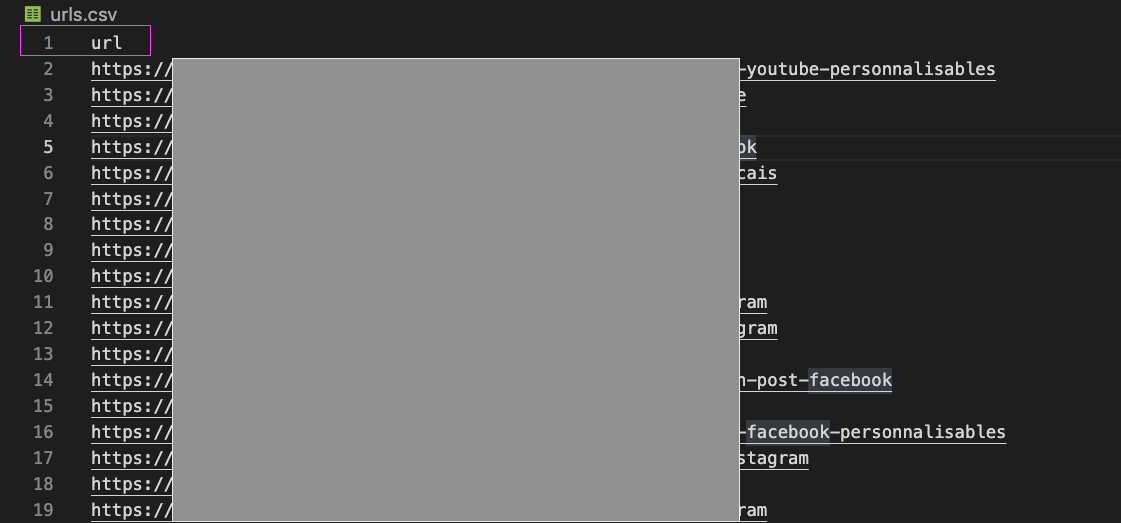
Once you have the URLs, copy and paste them into the file "urls.csv", keeping the first line intact (it should say url on the first line). URLs are to be pasted one per line.
Launch the test
To do that, we need to decide which format we'd like to use, mobile or desktop, and the number of tests that each pages has to go through.
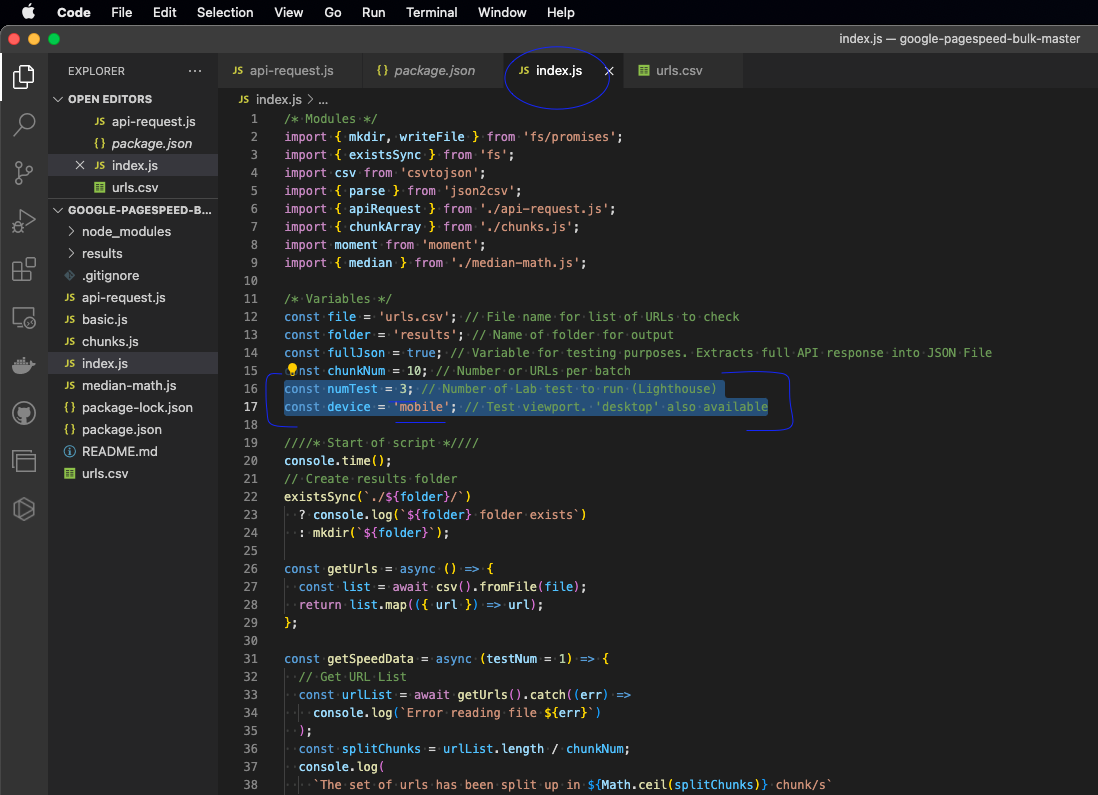
In the file called index.js, at line 16, you can change the number to 3 for example. This will give us a better understanding hopefully.
And let's choose 'mobile' format, at line 17 const device = 'mobile'; which you can change to desktop if you'd like to run that.
Save, and once done, go back to the terminal and type the command node index.js
You will start seeing the tests in progress populate in the terminal window.


The test results
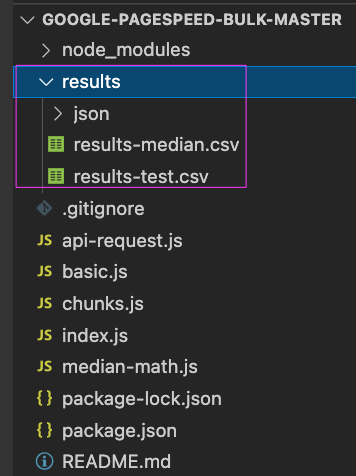
The script will automatically create a new folder, within the main working folder, called "results". In there, once the test is done, you will see CSV and JSON files. Open the CSV files in your favorite table editor such as excel or google sheets.
The rest is self explanatory.
For reference, here's an example of test results:

You can find a lot of information on web.dev or Mozilla, and Google's PageSpeed Insights documentation.
Just note that page size is in MB and the rest of the measures are in milliseconds (so a measure of 7842 is 7.8 seconds)
Questions, comments? Come discuss them on Reddit
I have ran 2 tests for 21 URLs, in well under 4 minutes … something that would have taken much more time if I had gone "page by page" .
Thanks for following along 🚀