Using Google Indexing API - English Tutorial
Index up to 200 URLs per day rapidly
By WebForGood
This tutorial is for those who wish to test out the Google Indexing API. It's suitable for novice users, website managers and webmasters alike. The original tutorial is in French language on WebForGood 🇫🇷
Table of content
- Concept
- Quota
- Before you begin
- Summary for agencies, webmasters & devs
- Step by step tutorial
- 1 - Get the source code
- 2 - Google Cloud Platform - a) Create an account in Google Cloud Platform - b) Create a new project - c) Go to API and services - d) Create Credentials - e) Create a Service account - f) Get the private JSON Key - g) The JSON Key content
- 3 - Google Search Console - a) Open the console - b) Settings - c) Go to Users and Permissions - d) The Service Account email
- 4 - Run the indexing script - a) Gather the URLs - b) Run the code
Concept
The aim is to tell Google about new or existing pages, and get their status updated or indexed as soon as possible. You can process multiple URLs (pages) without having to inspect them manually in Google Search Console.
Quota
200 URLs per day
Before you begin
Ideally, you would test the API if your website is not in the JobPosting or BroadcastEvent niches. As per Google, the API is reserved for JobPosting and BroadcastEvent websites.
You will need the following tools installed on your computer (Mac and PC versions avaiable):
Visual Studio Code or equivalent download from Visual Studio website
Node JS Website of Node JS
And Google Search Console: make sure it is configured for your website and that you have Owner rights. Start page of Google Search Console
Summary for agencies, webmasters & devs
*If you find this summary too vague, you can read the detailed *step by step tutorial below
- Clone this GitHub repository and run the command "npm i"
npm iCreate an account with Google Cloud Platform > Console and then create a new project
Search for the Indexing API in the Library
Activate the API and its key
Create and activate the "Service Account". You should get the email address of the service account under the Credentials section.
Add this email address as owner to your Google Search Console
Back to Google Cloud Platform, go to "IAM and admin" section, select Service Accounts in the vertical menu on the left handside
Click on that email address and go to the Keys tab. Add Key > Create New Key > Choose format JSON
Allow the private JSON key to download to your computer. Open it in the code editor and copy all of its content and paste it in
service_account.jsonby replacing its content. Remember you have downloaded that file from GitHubYou are now ready to start adding the URLs of the pages you wish to update onto
urls.txt. Do not leave any empty lines.Open the terminal et run the command
node index.js
Rince and repeat.
Step by step tutorial
Assuming you have followed the "before you begin section", proceed with the following steps.
1 - Get the source code
a) Download the source code from Github onto your computer.
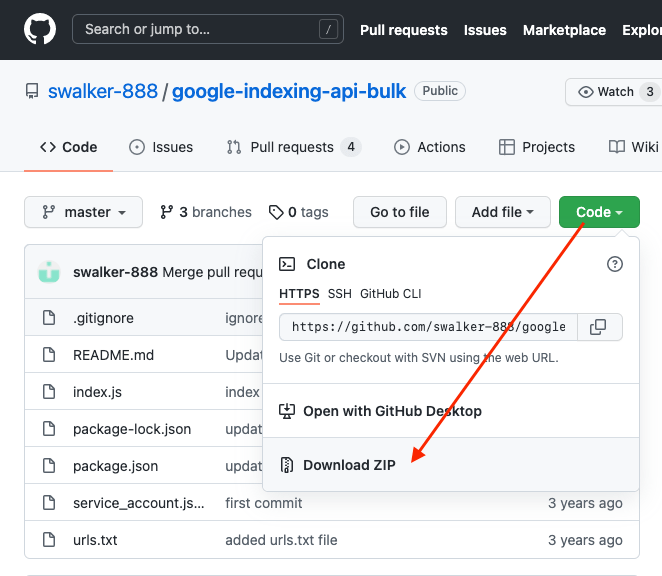
b) Create a folder, let's call it "google-indexing-api" for ex, it doesn't really matter what you call it.
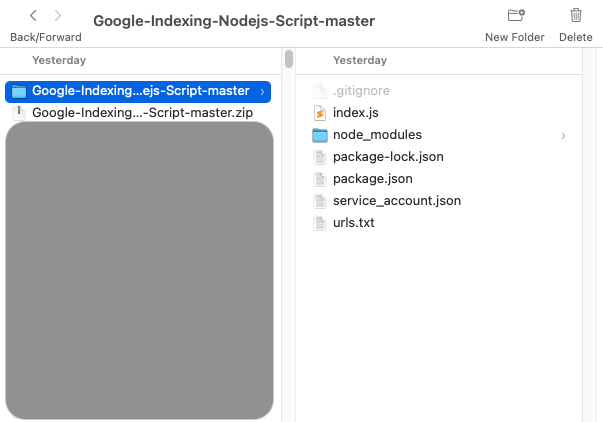
c) Click on Download from GitHub and unzip it in the folder you have just created. It should contain 5 files and 1 folder called node_modules.
Here's an example:
d) Open the folder with Visual Studio Code
Then open the terminal small window.
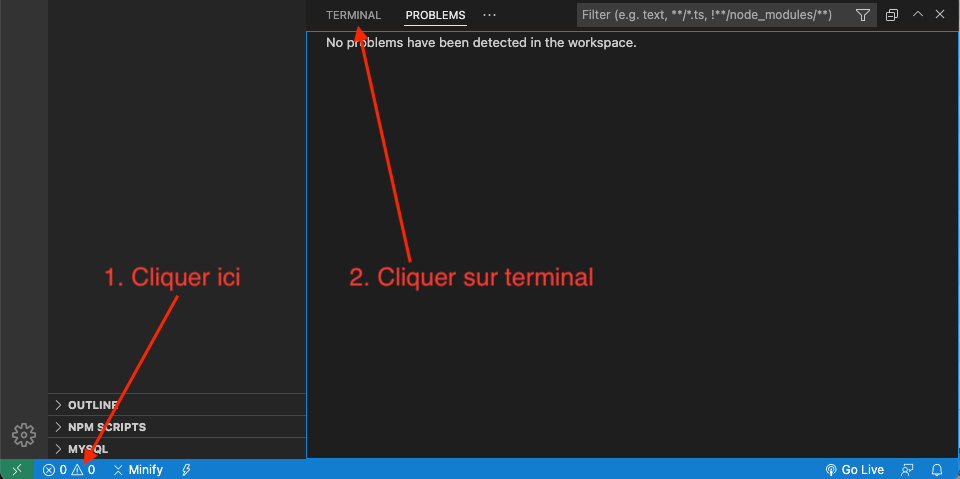
And run the command "npm i" to install the required modules. This is important.

It is normal that it should take some time to complete, as long as you're connected to the internet, you'll be fine, and while you wait for it to complete jump to the next step.
2 - Google Cloud Platform
This is where you create an account (it's free) and then a new project, in order to request the API and its keys, that we are going to need in Visual Studio to start making the requests for Google to index or remove pages.
You got that right, the script runs from your computer (connected to the internet of course).
a) Create an account in Google Cloud Platform
Click on "Console" after you have logged in to the Google Cloud

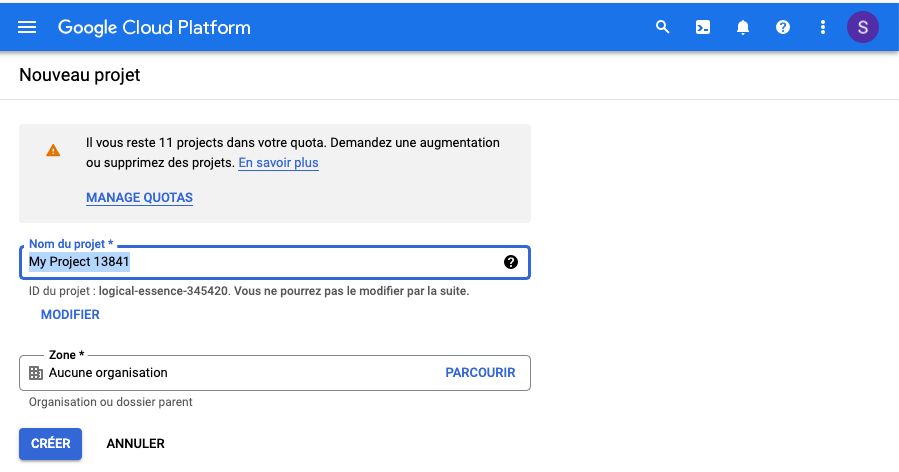
b) Create a new project
The name of the project is a must have, but the name of the organisation can remain as default "No organisation".
c) Go to API and services
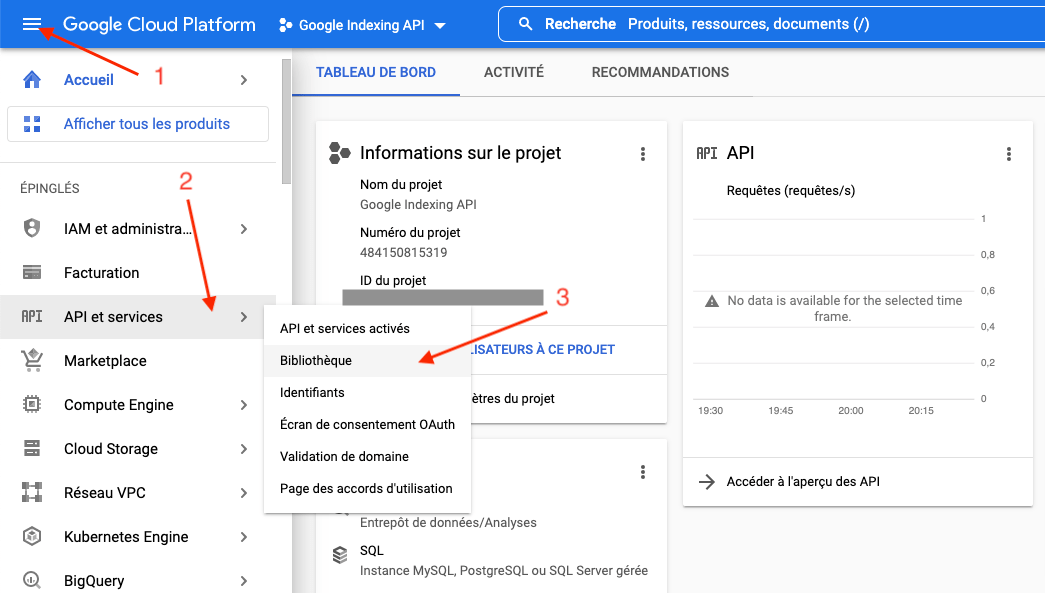
Under the vertical menu (left handside), Click on API and services then "Library".
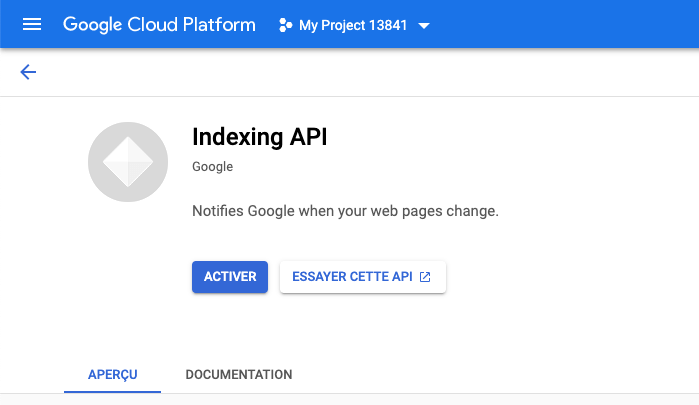
Search with the word "Indexing" and select "Indexing API" .
Activate the API:
d) Create Credentials
Under the same window of API and services, Click on Credentials (left vertical menu). Click "+ Create Credentials" then "API Key" which you can save (but not mandatory).
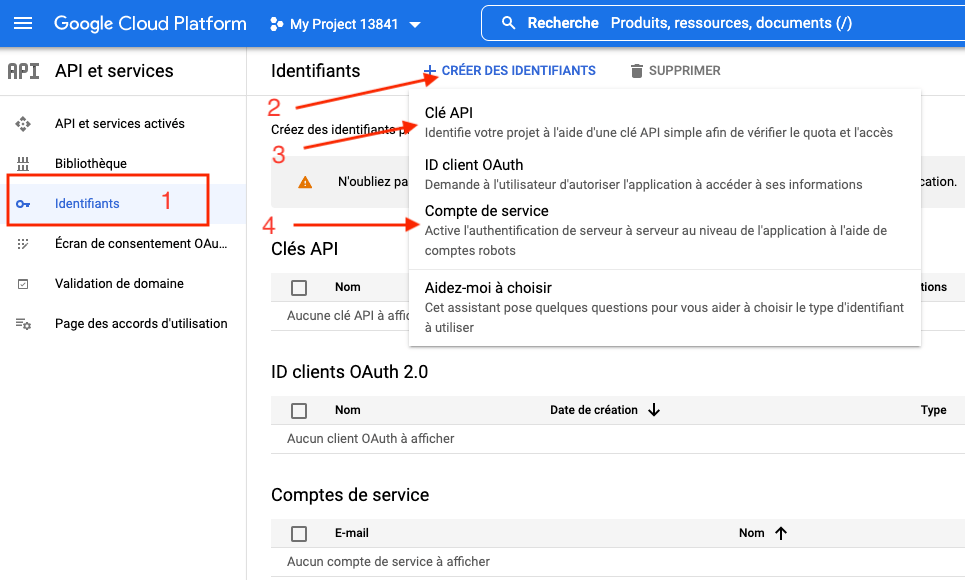
e) Create a Service account
This is a crucial step, but why?
Because it will generate the unique email address that we need to add to the GSC as owner so that all components are connected.
Give it a name that you can distinguish in the future
As for the ID, it does generate automatically by clicking the small icon on the right handside in that field
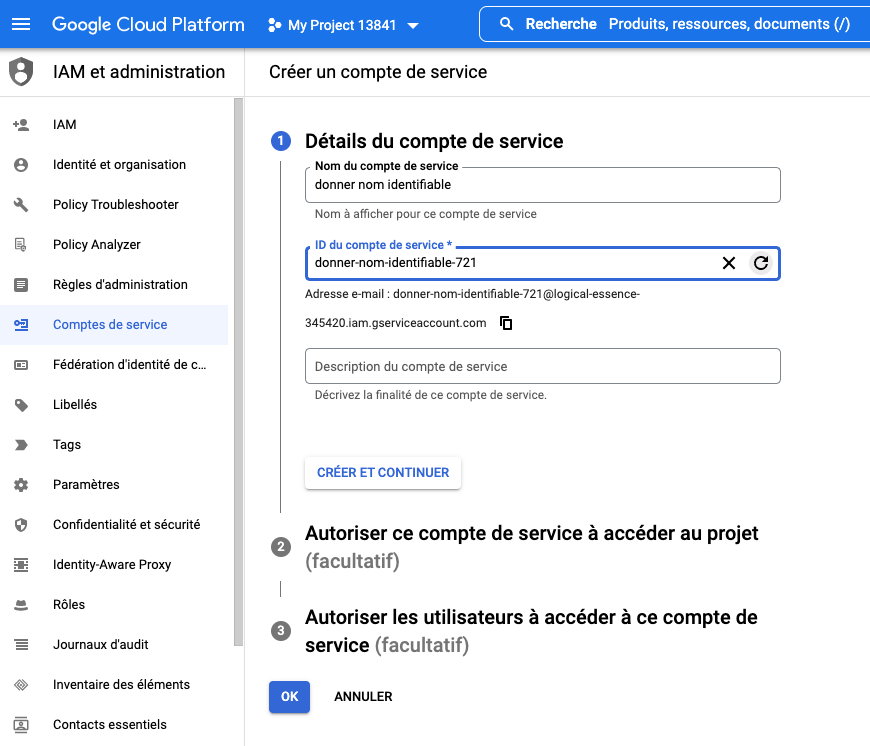
Click "Create and continue". A new window opens. Select the role as "Owner".
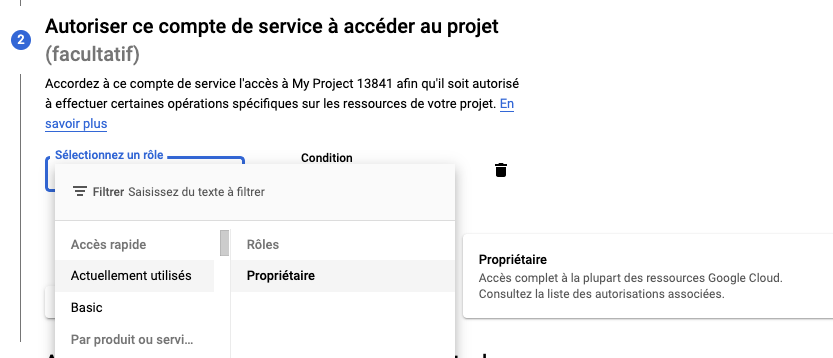
Click OK in blue to finalize, you'll see a page like this one below.
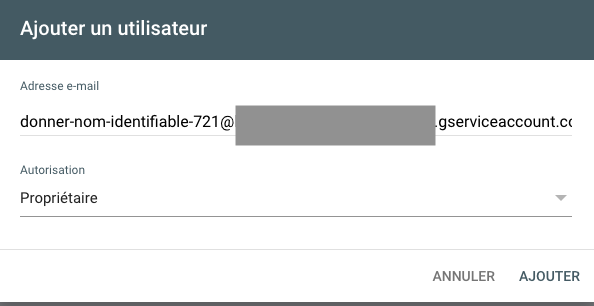
In the "Service accounts" section, copy the email address and save it somewhere you can go back to, and add it to the GSC as Owner.
But first we need its private key in JSON format. We will use it as the service_account.json file in a while.
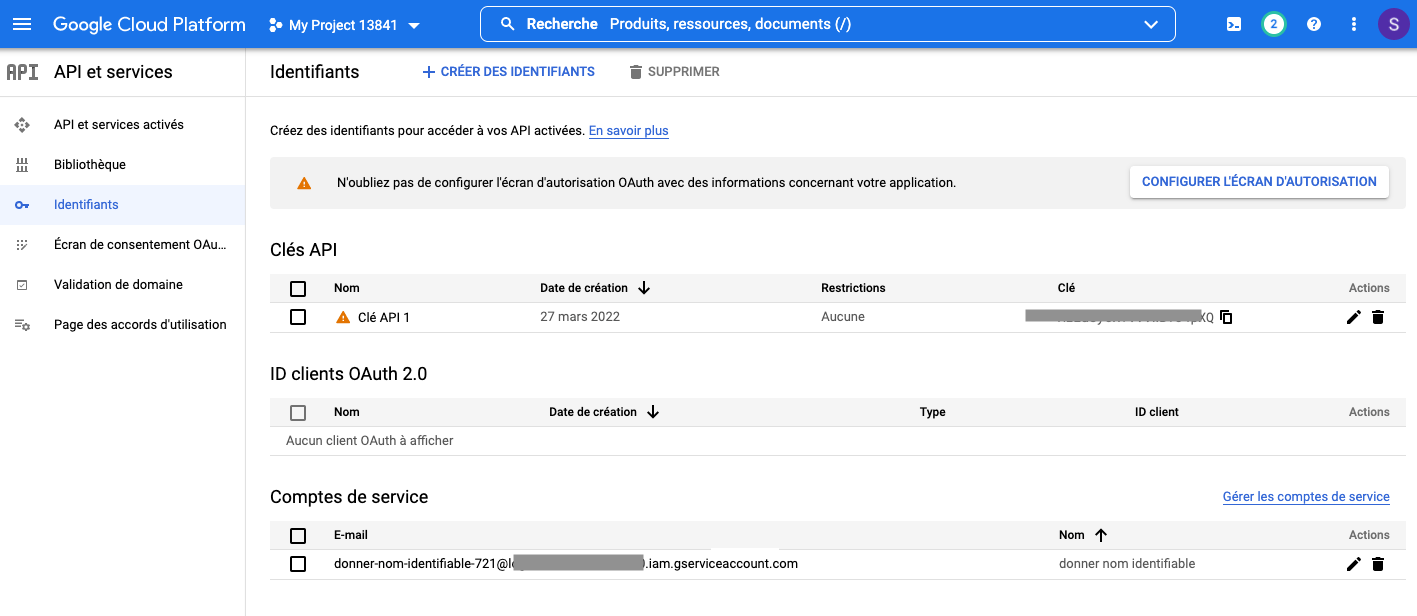
f) Get the private JSON Key
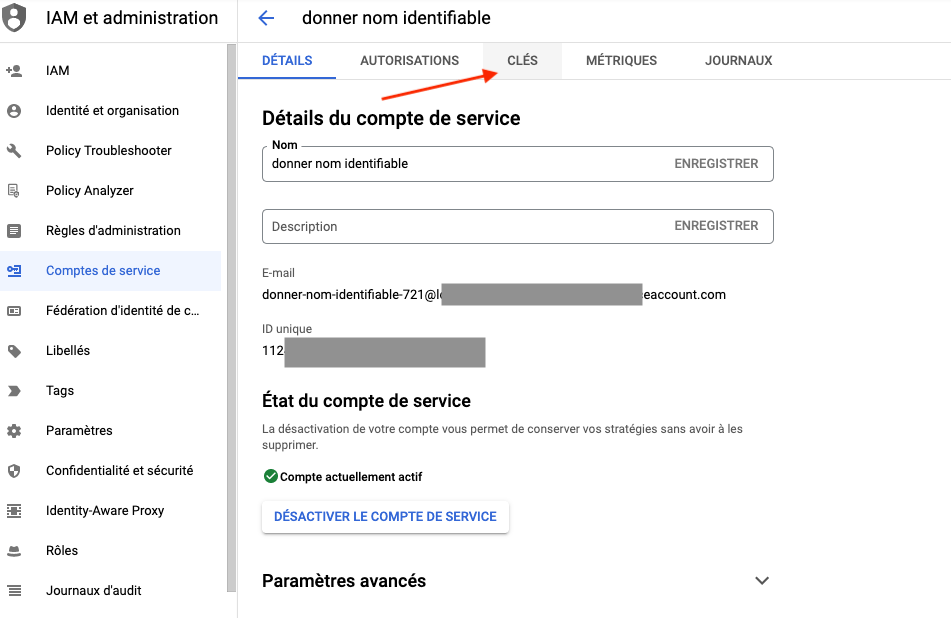
In the same window, Click on the email address, a new window opens up.
Click on the KEYS tab (on top).
Click Add Key, then Create Key and select JSON format.
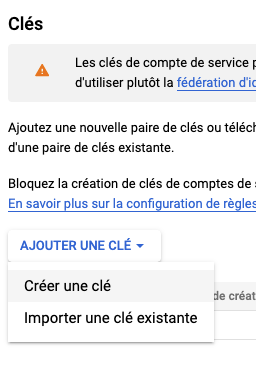
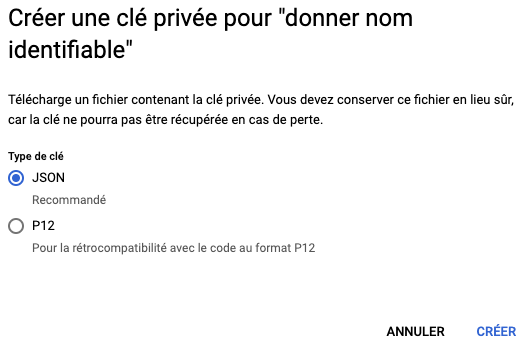
The JSON file will download to your computer and a message appears confirling that.
g) The JSON Key content
Copy all of the content of the JSON file after opening it in your code editor. Here's an example of how it should look like.
And paste the content onto the file service_account.jsonreplacing all the original code that was downloaded from GitHub.
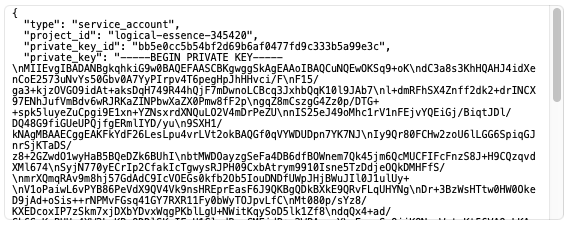
The service_account.json file should look like this:
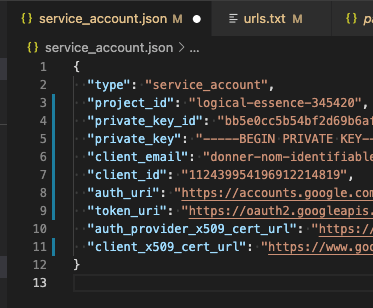
Wonderful, so far so good, you're almost there ⭐️
3 - Google Search Console
Again, the aim here is to add the email address of the Service Account as Owner of that particular Google Search Console account.
a) Open the console
You can visit the Google Search Console and choose your website in question.
b) Settings
Visit the Settings page, found under the left handside vertical menu.
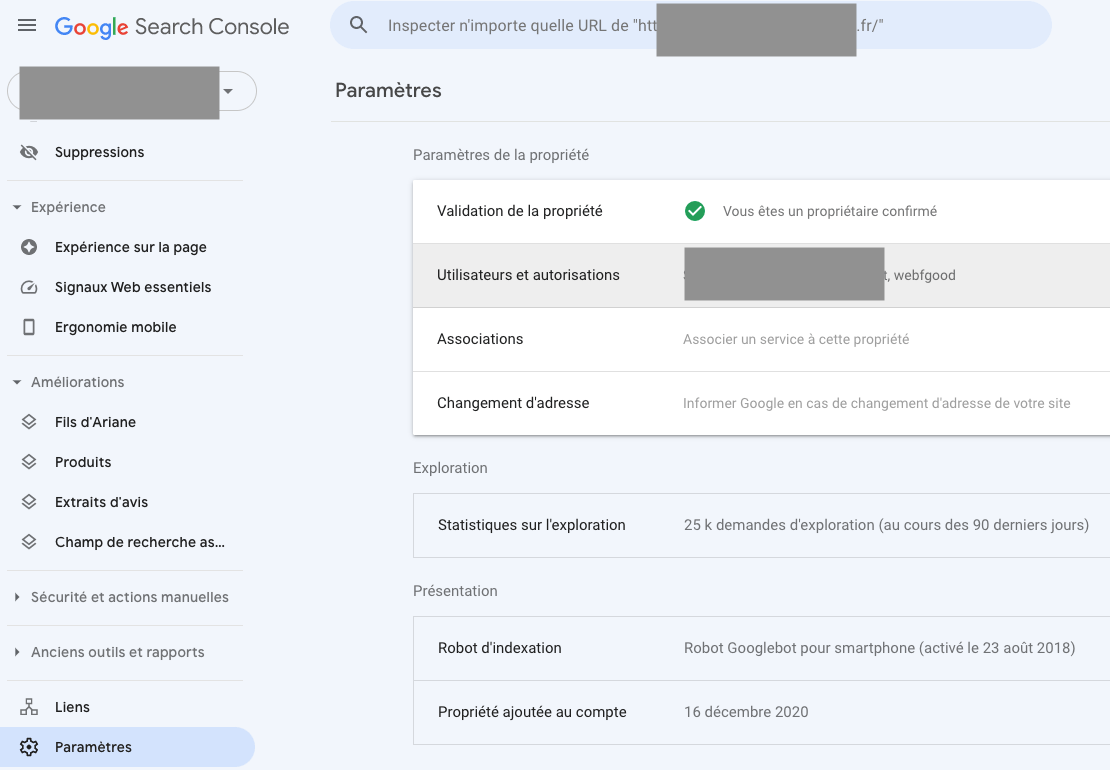
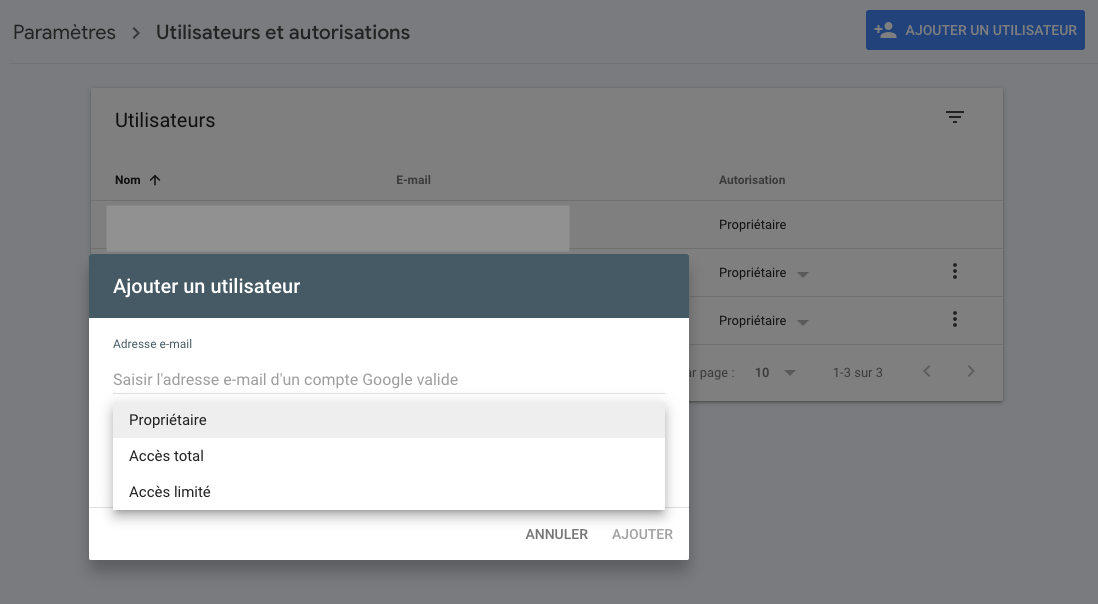
c) Go to Users and Permissions
Click on Add user, and set the Permission to Owner.
d) The Service Account email
Add that email as owner
💫 Congrats! You are set and ready to start indexing rapidly 200 URLs per day 🏆
4 - Run the indexing script
This is done from your Visual Studio Code or code editor.
a) Gather the URLs
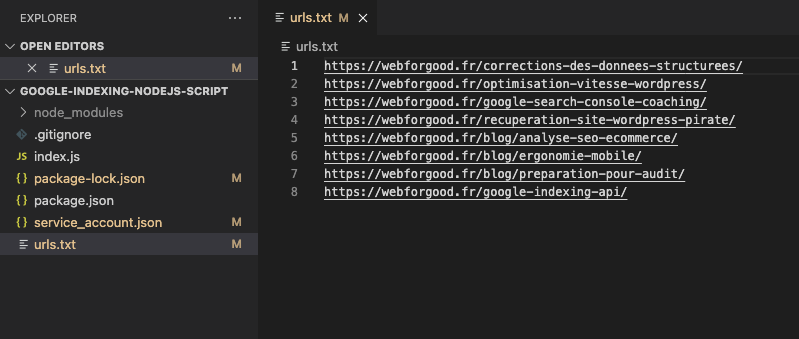
Gather the URLs of the pages that you'd like indexed and paste them in the file called urls.txt. Do not leave empty lines.
Example :
b) Run the code
Now that the URLs are set in the file urls.txt.
The file index.js will do the work for us, we just need to run it. Here's how:
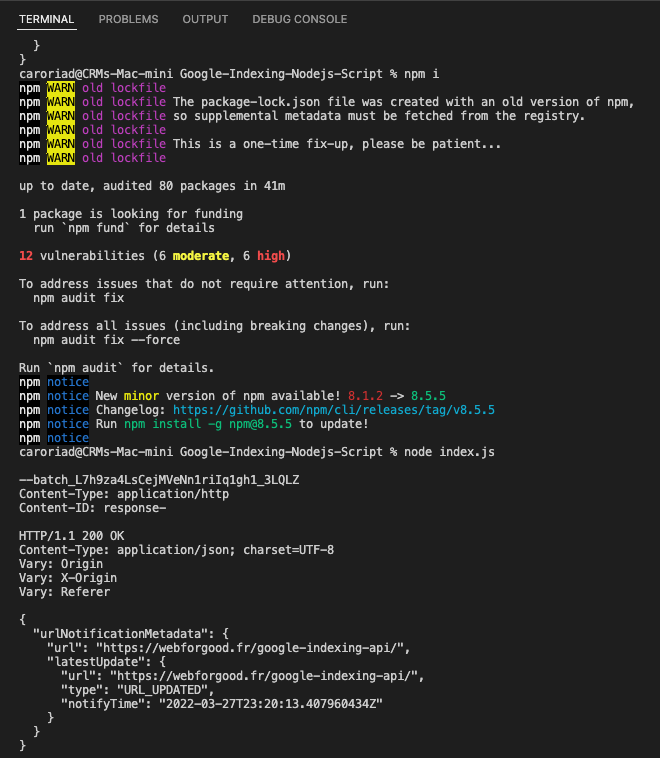
In the terminal window, type node index.js and hit enter
Here's an example response from the server:
In a few minutes/hours, your pages will be indexed ✨
Questions, comments, errors, something not working, not clear? Ask on Discord or Twitter@webforgoodf or Facebook @webforgoodf
Thank you for following along 🚀
Credits and thanks to Steve from Journey Further for the source code on GitHub.